Editing HMI Symbol Properties
The 'Description' editor available for user-defined HMI symbols allows the maintainer of the symbol to enter meta data information on the HMI symbol. This editor can be used, for example, to describe what has changed since the last update (modification) of the user-defined HMI symbol.
The 'Description' editor provides the following two editors:
- Version history editorThe version history allows you to track the updates being made to the user-defined HMI symbol. Use this editor to enter version information such as the version number, life cycle, author, etc. on the symbol.
- Documentation editorUse the documentation editor to enter meta data information on the user-defined HMI symbol. The editor provides a wide range of options for text formatting and inserting content such as images.
The 'Description' editor for a user-defined symbol is opened by selecting the editor under the HMI symbol page tab in the editors area.
 HMI symbol properties editor
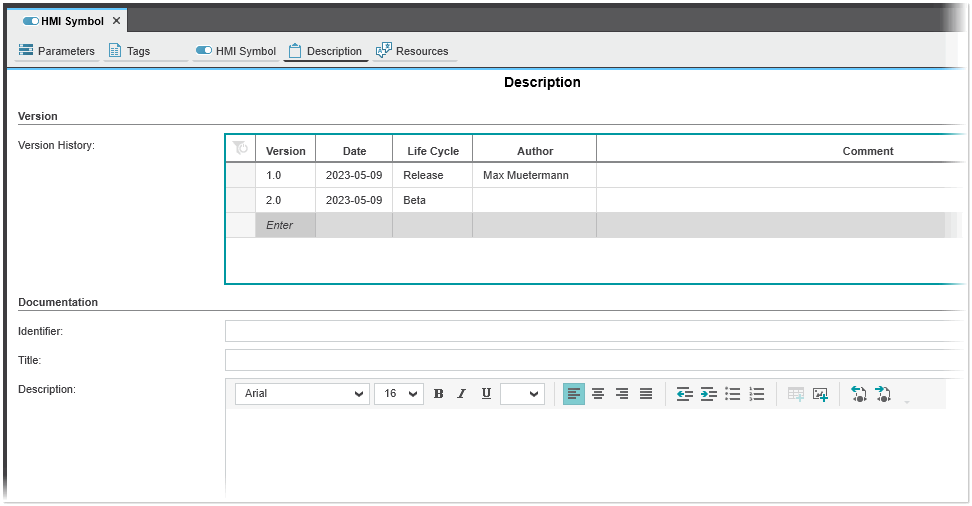
Version history editor
The version history table shows the properties associated to each version. It contains the following columns:
| Column | Description |
|---|---|
| Version | Displays the version number that identifies the version. The version number is mandatory when you add a new version row to the table.When you enter a version number into an empty cell and confirm the value by pressing <Enter> or the <Tab> key, the 'Date' and 'Life Cycle' columns are automatically filled and a new empty table row is added. |
| Date | Indicates the date the version has been created. The date is automatically filled with the current date (when you enter a version number in the 'Version' column) and can be changed manually. |
| Life Cycle | The cell provides a list of predefined life cycle states that can be selected from the drop-down list. Use this parameter to specify the stage of the development of the element.The life cycle is automatically set to '-Undefined-' when you enter a version number in the 'Version' column. |
| Author | Indicates which author has added the version. |
| Comment | Comment about the version. |
To edit a table cell, double-click into it. Deleting an existing row is not possible.
The version history table can be sorted by clicking on the 'Date' column header (clicking the header toggles between ascending sort, descending sort, and unsorted). The arrow symbol in the column header indicates the currently selected sort order.
Documentation editor
In the upper area, you can enter any information about the product in the 'Identifier' and 'Title' input fields (for example, a product number and the product name).
The content is entered in the input area. Here you can use either the Rich Text Format editor or the HTML editor to edit the description (the default editor used for a new project is selected in the 'Extras > Options' dialog under the 'Tool | Description' category). For each editor there is its own toolbar which provides various commands to edit the content.
| Note
It is not possible to switch between both editors in an existing project. |
Using both editors you can export the contents to an HTML file and import contents from an HTML file (see the description below).
Both editors support basic text editing options such as copying, pasting, cutting, and moving text (you can also use standard keyboard shortcuts to cut (<Ctrl>+<X>), copy (<Ctrl>+<C>), paste (<Ctrl>+<V>), and delete (<Del>) selected text).
Using the Rich Text Format editor
The Rich Text Format editor is an easy-to-use editor that allows you to format your text, add tables and lists, and insert content such as images to the documentation. The editor provides typical text formatting options including font, font size, weight, font color, alignment, etc.
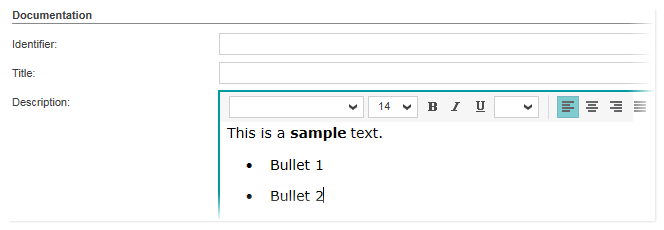
In addition to the typical text formatting options, you can:


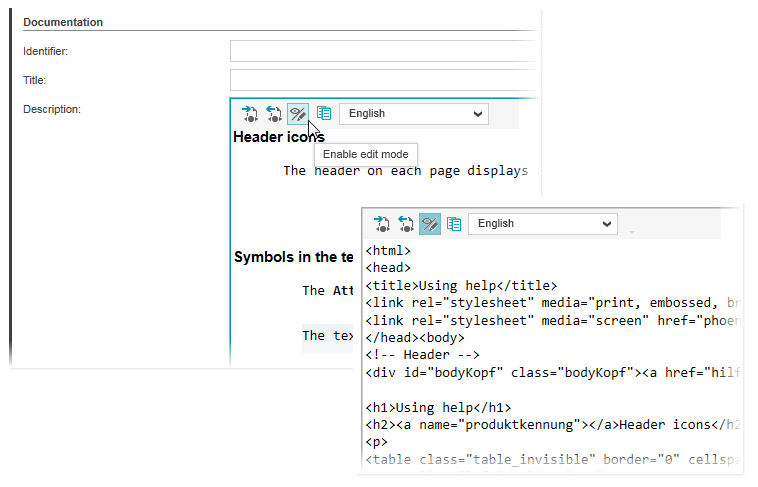
Using the HTML editor
Using the HTML editor, the content is entered in edit mode as plain text and formatted using standard HTML tags and CSS styles as shown in the example below. The 'Enable edit mode' icon toggles the editor between edit mode (button pressed) and WYSIWYG mode which shows how the content will display.
| Further Info
See also the topic "Providing Help Files and Library Description Files" for details how to create descriptions for user-defined function/function block POUs. |
Assign CSS file/import help template folder
Optionally, you can assign a CSS file containing the styles used to format the HTML elements. The name of the used CSS file is shown below the description editor box.
The CSS file used by default is contained in the help template folder. This folder contains, besides the CSS stylesheet, all files that allow you to create online help pages for user-defined function and function block POUs. The location of the default template folder is defined in the 'Extras > Options' dialog under the 'Tool | Description' category).
To use your own help template files and CSS file for documentation purposes, you can import another help template folder by selecting the 'Import Help Template' command from the project's context menu.
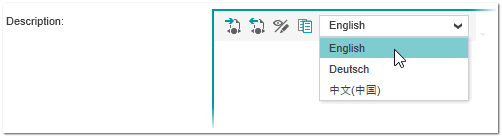
Select language for description
The function/function block POU description can be provided in the languages that are supported by PLCnext Engineer (the list of available user interface languages is shown in the 'Extras > Options' dialog under the 'International > International Settings' category). Depending on the active user interface language, the language-specific POU description is displayed when calling the help for the FU/FB POU in PLCnext Engineer.
To select the description language, choose the desired language in the language combobox (the combobox contains all user interface languages supported by PLCnext Engineer).
Export/import contents to/from an HTML file
- To export the contents (text, images, etc.) to an HTML file, click the
 icon on the toolbar, specify a location and file name, and click 'Save'.If you have assigned a CSS file when exporting the contents using the HTML editor, the CSS file is also exported.
 - To import contents from an HTML file, click the
 icon on the toolbar, select the file in the file open dialog, and click 'Open'. The text will be inserted at the current cursor position.