Connecting Objects
Drawing connection lines between objects is possible in FBD/LD and SFC code worksheets.
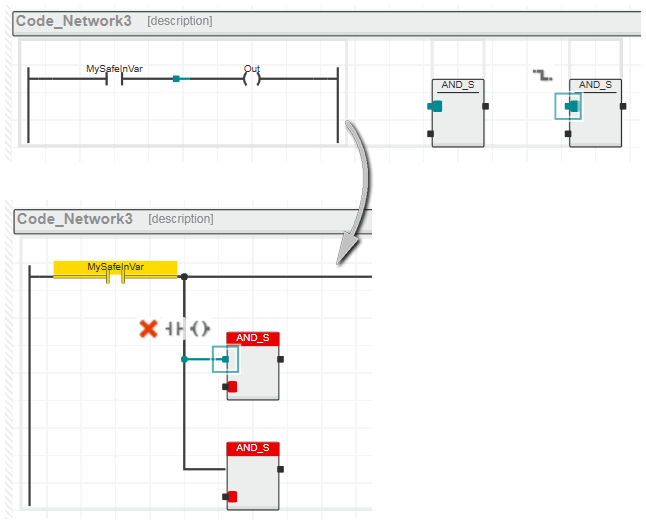
In NOLD/SNOLD, the network layout is arranged automatically and cannot be modified by the user. Objects and lines cannot be moved (in contrast to the free graphical editor) and (if set accordingly in the graphic editor settings) the width of an LD network is fixed. However, unconnected objects can be integrated into an existing network by drag & drop or they can be inserted unconnected into an existing section (right of the right power rail). In such cases, the manual connection of connection points in NOLD/SNOLD is necessary.
Objects are only ever connected at connection points
...
- by drawing connection lines.
- by dragging objects to connection points of other objects.
- by selecting several connection points.
What do you want to do?
 Draw a connection line
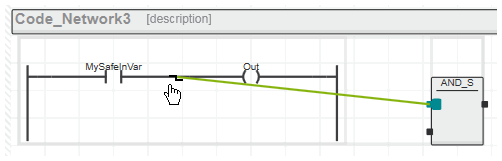
The graphic editor only allows to draw "valid" connection lines. When drawing a line, the editor automatically checks whether the connection line is permitted or not. The color of the connection line indicates the valid (green line) or invalid (red line) connecting operation.
- In the code worksheet, set the cursor on the connection point where the connection line is to start. The connection symbol is added to the cursor.
- Hold the mouse button down and drag the mouse directly to the destination connection point. As soon as you position the mouse cursor on a valid connection point, the connection line is displayed in green.
- Release the mouse button to create the connection. The editor automatically determines the route for the connection line.
In NOLD and SNOLD, unconnected objects have been possibly inserted to the right of an existing power rail. To connect such an object, proceed as described above.
Example:
Connect objects using drag & drop
- Click the object to be connected and hold down the mouse button.
- Drag the object to the desired destination connection point. When you drag the object close to a valid free connection point, the editor automatically connects the elements with a green connection line.
- Release the mouse button when the green connection line between the objects is shown. The dragged object is positioned and connected automatically (the connection line is routed automatically by the editor).
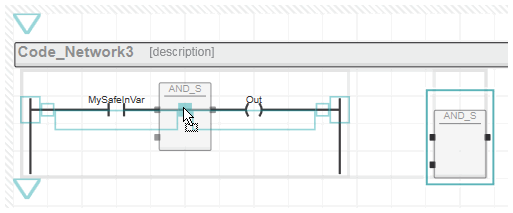
In NOLD and SNOLD, unconnected objects have been possibly inserted to the right of an existing power rail. You can drag such an object and drop it on an existing object to connect it.
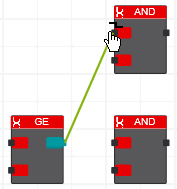
While dragging and dropping the object onto an existing LD network, the valid insertion positions for the object are indicated by colored markers (as shown in the following example). The connection line in the LD network is highlighted when the dragged object is permitted to be dropped.
Example:
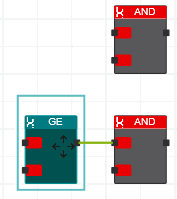
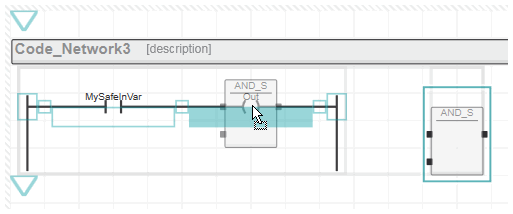
When dropping the block while an LD object (coil in the example below) is highlighted, the block will be inserted parallel to this LD object.
Example:
Connect several connection points
To create connection lines between several connection points in one step, proceed as follows:
- Select all connection points to be connected by holding the <Shift> key down while left-clicking each required connection point (the selected connection points are highlighted green).
- Right-click one of the selected connection points and choose 'Connect Objects' from the context menu. Alternatively, press <Ctrl>+<Shift>+<C> or click the
 button displayed at the connection point selected last.
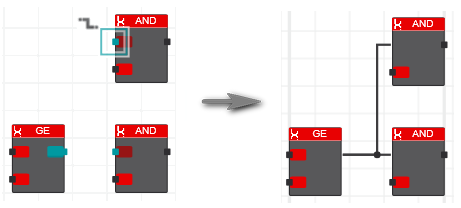
In NOLD and SNOLD, the context menu item is not available. The <Ctrl>+<Shift>+<C> shortcut however performs a multi-connection as shown in the following example.