Editors Area
Double-clicking a tree node in the PLANT opens its properties in the editors area. Editors are also opened when double-clicking a POU type (program, function block, function) or
HMI object in the COMPONENTS area.
Note that double-clicking a program/FB instance under a task node in programming mode opens only the Data List of the corresponding instance. Code worksheets and variables tables of the POUs cannot be opened from the PLANT tree but must be opened via the COMPONENTS area.
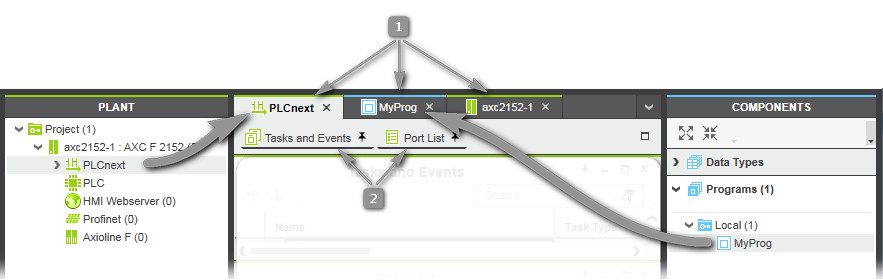
For most objects, several editors appear as editor group in the editors area (see (2) in the figure below). Refer to section "Available editors" for details which
editors are provided for the various PLANT tree nodes and COMPONENTS types.
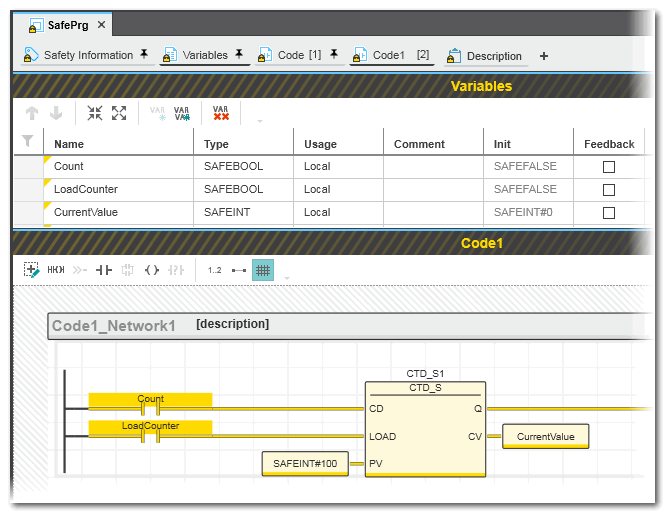
When editing the code or variables of a safety-related POU (you have to be logged on to the Safety-related Area for that purpose), the editor title bar with hatched background indicates the safety-related context. While editing, the consistency of safety-related data is verified continuously by the corresponding editor to help detect data corruption.
 Example for a safety-related code (SNOLD) and variables editor:
To open an editor in an editor group, click the editor name. Opened editors are underlined black, closed editors are underlined grey.
If several editors are open, they are tiled
horizontally in the editors area. Each editor can be minimized/maximized/closed as well as pinned and unpinned using its own common window toolbar in the upper right corner:  .
.
Refer to the section "Editor handling" for details on these commands and options.
Each editor may contain its own toolbar.
Debug mode
If PLCnext Engineer is switched to debug mode (or monitoring mode for the Safety PLC), i.e., if attached to the running application process and online values can be displayed in the editors, the editor tabs show a triangle.

For program and function block POU types, an instance must be selected to display online values. For that
purpose, right-click into the POU editor, select 'Go To Instance Editor' from the context menu and open the desired instance worksheet in debug mode. Alternatively, you can
expand the 'PLCnext' node in the PLANT in debug mode and double-click the desired program or FB instance node in the tree.
The Safety PLC, if included in your project, distinguishes the monitoring mode (read-only access to the Safety PLC) and the debug mode (allows write access). While the debug mode is active, the status bar shows a red dot  next to the entry 'Safety PLC: Debug Mode Active'.
Refer to topic "" for further information. In debug mode, can be executed and the can be used.
Available editors
 Editors for PLANT tree nodes
Editors for COMPONENT types
Editor handling
Switching between open editor groups/editors
If more editor groups are open in the editors area than visible, the buttons < and > appear at the upper right corner (see (1) in the figure below). Clicking a button switches to the next or previous editor group.
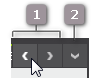
The icon (2) opens a drop-down list for directly selecting an editor group.
Furthermore, the UI navigation function via keyboard can be used:
Navigation in PLCnext Engineer is possible with the keyboard anywhere in the user interface:
- Press and hold the keyboard shortcut <Ctrl> + <Tab>.A navigation control appears showing the controls on the left side and the currently open editors on the right:
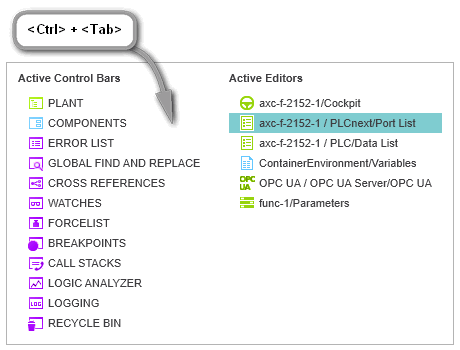
- While holding <Ctrl> + <Tab> down, use the arrow keys on your keyboard to navigate to the desired control or editor and release the shortcut to set the cursor into it.
Switching between editors of an editor group
You can switch between the editors of an editor group (represented as tabs at the upper border of the editors area) via
- KeyboardPress the <Ctrl> key combined with the consecutive number of the editor tab, starting with 1. Example: In the following editor group, the shortcut <Ctrl>+<3> opens the worksheet 'Code1'. Press <Ctrl>+<0> to open the 10th editor.
Note that the number in brackets [...] is the number in the execution order of the code worksheets but not the worksheet number.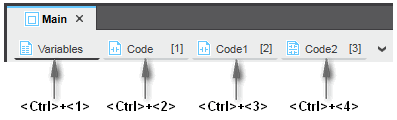
- Drop-down icon at the top right corner
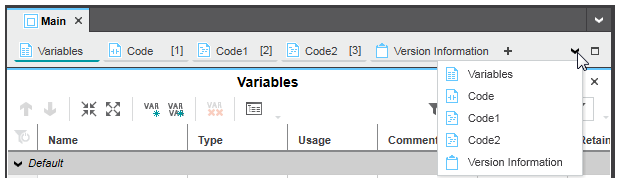 Clicking the drop-down icon at the top right corner in the editors bar opens the list with all editors of the current editor group. Select the desired editor from the list to open and bring the editor into focus.
Split Screen Mode for Editor
Groups
The display in the editors area can be split horizontally
or vertically.
Each editor group appears on one separate tab in the editors area. If several editor groups (tabs) are open, it may be useful to display one editor group separately while the other open editor groups remain tabbed. This way, two editor groups are visible at the same time. The split screen mode facilitates data comparison or copying/moving data between editors.
- Click into the editor group tab which you want to split from the other editor groups (tabs).
- Select 'Window > Horizontal Split Mode' or 'Vertical Split Mode' or click the related icon on the main toolbar.
To exit the split screen mode, deselect the menu item or toolbar icon.
Expanded Area for Editors and Editor Groups
PLCnext Engineer provides two possibilities for maximizing the editors area. Both are executed by the maximize icon  which is available in each editor window (see (1) in the following figure) and in the tab bar of the editors area (2):
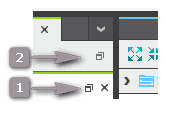
Maximize icon (1) enlarges the current editor window to fit the entire screen.
Icon (2) at the right side in the tab bar of the editors area maximizes the entire editors area including the editor group tab bar. This command is also available in the 'View' menu.
In both cases, PLANT and COMPONENTS are hidden. By hovering the mouse pointer to the title bar of the hidden PLANT or COMPONENTS area, it is expanded. Double-clicking an element in the expanded area first opens the related editors group and then hides the area again.
To exit the maximized editor mode, click the respective maximize icon again.
Note
Both maximize functions can be combined. |
Pin/unpin particular editors
You can open several editor windows in the editors area at the same by pinning them. Only if pinned, an editor window remains visible when another editor window is opened. If an editor window is unpinned, it disappears when you open another editor.
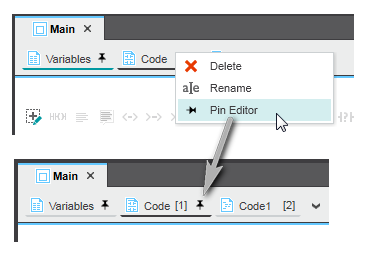
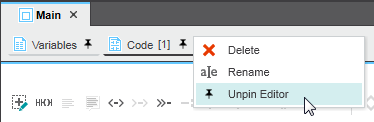
To pin an editor window, right-click the editor window tab and select 'Pin Editor' from the context menu. Pinned editors are marked with the pin icon on the tab. To unpin, select 'Unpin Editor' from the context menu. Both commands are also available as icons in the upper right corner of the editor window:
 and
and 
Details and example
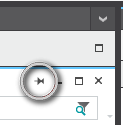
The pin command is also available in the upper right corner of each editor. The horizontal pin icon indicates that the editor is currently unpinned:
Even if an editor is pinned, you can hide it by clicking the editor name. Visible editors appear with a black underlined editor name, hidden editors are underlined gray.
The pinning is not removed by hiding an editor. To unpin a pinned editor, right-click its editor tab and select 'Unpin Editor' from the context menu. The unpin command is also available in the upper right corner of each editor.
The pin icon is then removed and the editor is hidden when opening another editor.